
It’s been a while since my last post. Lately, instead of web stuff, I’ve been completely absorbed in cars.
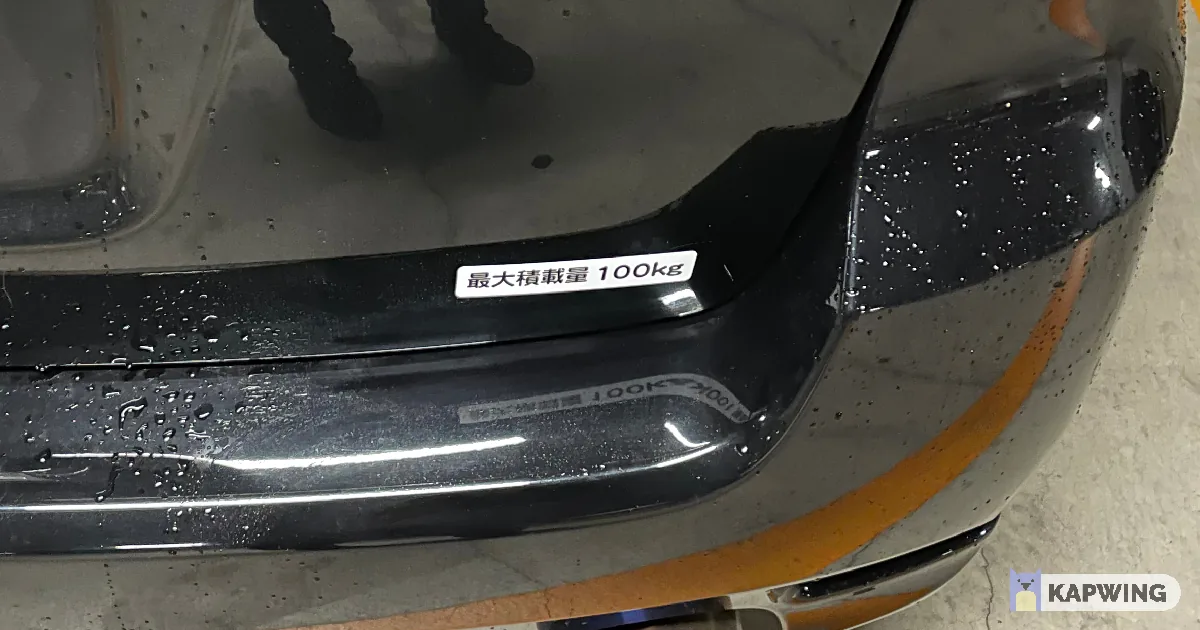
On that note, I recently had my Subaru Legacy (a “3-number” passenger car) registered as a cargo vehicle (a “1-number” vehicle), so I’m going to write up how I did it.
NOTEUpdate (September 2026): I got tired of retracing the steps in this article myself every time, so I built a ledger that turns everything from buying the car to selling it into a series of stages. It’s called Todoroku. I also put the weight distribution Excel sheet I used to work out the maximum payload on the web, so you can use it via the weight distribution calculator mentioned later.
What is cargo registration?
First, what is cargo registration? The vehicle inspection certificate (shakensho) has a field called “use”. The idea is to change it from passenger to cargo, which changes the tax bracket that applies to the car.
I’ll skip the details of the tax system here, but for the vehicle I registered as cargo this time, the taxes changed as follows. (As of October 3, 2026. For the old weight tax and compulsory liability insurance, I’ve divided the 24-month amounts by 2. The insurance figures are the base rates for policies starting on or after November 1, 2026.)
| Before | After | |
|---|---|---|
| Automobile tax | 51,750 | 8,800 |
| Weight tax | 22,800 | 8,200 |
| Compulsory liability insurance (jibaiseki) | 9,280 | 17,930 |
| Total | 83,830 | 34,930 |
| Difference | 0 | -48,900 |
As you can see, it gets quite a bit cheaper, but there are a few downsides.
The big one is that your ETC (electronic toll collection) toll class goes from standard to mid-size, so tolls go up. Let’s work out how much driving it takes before the savings are wiped out, using the Shin-Tomei Expressway (standard section). NEXCO tolls are (terminal charge of 150 yen + 24.6 yen × distance) × vehicle class ratio × 1.1 (consumption tax), where mid-size is 1.2 times standard, and the portion beyond 100 km gets cheaper through the long-distance discount. Dividing the 48,900 yen difference above by the difference per km gives the yearly expressway mileage at which the savings are wiped out.
| Distance per trip | Standard | Mid-size | Difference | Difference per km | Yearly distance where savings are wiped out |
|---|---|---|---|---|---|
| 50 km | 1,518 yen | 1,822 yen | 304 yen | about 6.1 yen | about 8,100 km |
| 100 km | 2,871 yen | 3,445 yen | 574 yen | about 5.7 yen | about 8,500 km |
| 200 km | 4,900 yen | 5,881 yen | 980 yen | about 4.9 yen | about 10,000 km |
| 300 km | 6,795 yen | 8,154 yen | 1,359 yen | about 4.5 yen | about 10,800 km |
The longer each trip, the more the discount helps and the smaller the gap gets. Unless you drive 8,000 km or more a year on expressways, it’s not a problem.
That said, the holiday discount (30% off) applies only to standard cars and kei cars, not mid-size, so if you mostly drive on weekends and holidays, the gap widens. (The late-night discount does apply to mid-size.)
| Distance per trip | Standard (holiday discount) | Mid-size | Difference | Difference per km | Yearly distance where savings are wiped out |
|---|---|---|---|---|---|
| 50 km | 1,063 yen | 1,822 yen | 759 yen | about 15.2 yen | about 3,200 km |
| 100 km | 2,010 yen | 3,445 yen | 1,436 yen | about 14.4 yen | about 3,400 km |
| 200 km | 3,430 yen | 5,881 yen | 2,450 yen | about 12.3 yen | about 4,000 km |
| 300 km | 4,756 yen | 8,154 yen | 3,397 yen | about 11.3 yen | about 4,300 km |
The other one is that the vehicle inspection (shaken) becomes yearly. That adds an inspection fee once a year, but it’s only around 2,600 yen (the fee for bringing a standard-size car in for inspection yourself, after the April 2026 revision). Some of you probably leave your shaken to a dealer or a shop, but if it’s a Japanese car, it’ll pass the inspection with hardly any maintenance. If you’re reading this article, you presumably want to save on running costs, so if you want to keep them down, buy your own tools and at least google the bare-minimum maintenance needed to keep a car going. If you can’t do that, just do what the dealer says and pay up. That’s what the service fee is for.
The cargo registration process
Getting a parking space certificate
This isn’t actually related to cargo registration, but you need it to transfer the vehicle into your name.
In my case, I submitted the documents below to the police station with jurisdiction over the parking lot I rent. Each prefectural police force publishes which station covers which area on its website. If yours doesn’t, just call and ask.
- Application for a parking space certificate (2 copies (1 copy if there’s no revenue stamp, e.g. when paying cashless))
- Location map and layout diagram of the parking space
I filled in both of the above by editing the XLSX files on the page below on my computer. They don’t need to be handwritten.
Parking space certificate application procedures (Japanese)
- Certificate of consent to use the parking space
For this one, if it meets the requirements (lessor, lessee, contract date, contract end date, etc.), you may be able to use something like your parking lot lease instead.
I always apply with a copy of my parking lot lease. It’s a good idea to ask the police station whether your own lease will be accepted.
Reference: Parking space requirements and documents proving the right to use it (Japanese)
Getting a temporary license plate
The car I put through this time had already been temporarily deregistered (ichiji massho) when I bought it, so I went to borrow a temporary license plate (kari number). Without one, you can’t drive the car to the inspection or to get it serviced for inspection.
To borrow a temporary plate you need compulsory liability insurance, but the car I’d bought had already let its policy lapse, so I took out a 5-day policy under a “commercial vehicle” contract.
It used to be possible to get a one-month compulsory liability policy for a deregistered vehicle, but apparently the rules on compulsory liability insurance were tightened, and now, when the purpose is borrowing a temporary plate, you can only get a 5-day contract as a commercial vehicle.
Also, some compulsory liability insurance agents don’t handle commercial vehicle contracts. You can reliably get one at the administrative scrivener (gyoseishoshi) offices on or near the grounds of the regional transport bureau (rikuunkyoku) office, or at an insurance company’s branch office. The car accessory stores I tried didn’t offer it.
Once you have the insurance, go to your nearest city hall or a branch office that lends temporary plates and apply to borrow one. The maximum loan period is 5 days, so I recommend going to borrow it only after the parking space certificate above has been issued and the pre-screening described later is done.
I got the order wrong myself once and nearly ran out of my 5 days, so the stages in Todoroku include this order, what to bring to each counter, and where you need cash.
Modifications for cargo registration
Criteria for being classified as cargo
First, how are the inspection criteria for each type of use set for cars? They’re determined by government ordinances from the Ministry of Land, Infrastructure, Transport and Tourism (MLIT).
Some of you might be thinking, “Isn’t that set out in the Road Transport Vehicle Act?”, but the Act only covers things in broad strokes, and how to interpret it is laid down separately in ordinances.
The official line is that automotive technology changes so fast that it has to be done this way, but I think it’s really a system for keeping everyone involved happy.
The criteria for passing inspection as a cargo vehicle are roughly as follows. I’ve pulled these from the ordinance and rewritten them in plain language.
- The floor area of the cargo space must be at least 1 m2
- The floor area of the cargo space must be larger than the floor area of the passenger seating
- The load weight must exceed the occupant weight of the passenger seating
- The opening for loading and unloading goods must be at least 800mm*800mm (height and width), with a projected area of at least 0.64 m2
- There must be a protective partition between the occupants and the cargo space
NOTE“Passenger seating” means the second row and beyond. It doesn’t include the first row, where the driver’s seat is.
Reference: On the Classification of Vehicle Uses, etc. (Directive) (Japanese)
On top of what’s written in the ordinance, NALTEC (the National Agency for Automobile and Land Transport Technology, which carries out vehicle inspections) has its own Examination Procedures Regulations (shinsa jimu kitei), which spell out how to handle points the ordinance doesn’t cover.
You might wonder whether a body that isn’t even the national government gets to interpret laws and ordinances however it likes, but swallow that for the sake of saving money.
Below are the provisions that add extra conditions for cargo registration. I’ve cut the irrelevant parts.
Chapter 4: How examinations related to vehicle inspections, etc. are conducted
4-17 Examination of cargo vehicles
4-17-1 Determination of use
(2) For designated vehicles, etc. with four or more wheels certified as passenger vehicles (limited to those whose body type is box, hood or station wagon), and for parallel-imported vehicles classified as “related to designated vehicles, etc.” with respect to such vehicles, the space for carrying the occupants’ belongings shall not be deemed a goods loading facility under the use classification directive.
However, limited to vehicles whose body type is station wagon (including vehicles other than station wagons that can be classified as station wagons when 6.2.7. of Attachment 3, “Guidelines for Examination of Parallel-Imported Vehicles”, is applied mutatis mutandis, and hood-type vehicles whose hood behind the seats extends to near the rear end of the vehicle), where the rear seats, etc. are removed (including vehicles certified with multiple seating capacity settings that were certified in a state equivalent to having the rear seats, etc. removed) or stowed and fixed to the floor, the resulting floor surface and the space for carrying the occupants’ belongings that is continuous with that floor surface shall be deemed a goods loading facility. Source: Chapter 4: How examinations related to vehicle inspections, etc. are conducted (Japanese)
In short, it comes down to this:
- The luggage space that box-type, hood-type and station wagon bodies come with from the factory is not counted as a goods loading facility under the use classification directive.
- For station wagons, or vehicles that can be classified as station wagons by applying 6.2.7. of the Guidelines for Examination of Parallel-Imported Vehicles, the space created by removing or stowing seats plus the original luggage space together count as the goods loading facility.
What I actually modified
Here are the modifications I made to meet the requirements above.
- The opening for loading and unloading goods must be at least 800mm*800mm (height and width), with a projected area of at least 0.64 m2
For this one, measure with a tape measure; if it’s 800mm or more, you’re basically fine. Note that it’s the height of the opening that matters, not the height of the cargo area.
- The floor area of the cargo space must be at least 1 m2
- The floor area of the cargo space must be larger than the floor area of the passenger seating
- The load weight must exceed the occupant weight of the passenger seating
This time I decided to fold down the right side of the second-row seat and fix it in that position (the NALTEC procedures say “stowed and fixed”, so it has to be fixed) to increase the cargo area.
As for how to fix it, I put a bolt through the headrest hole, attached a chain to it, and connected the chain to the striker under the seat that holds the seat cushion in place. It’s easy to remove, but I think most people would still call that fixed.
Also, some inspectors will tell you the floor has to be flat, but under the law and the ordinances it doesn’t have to be.
Note 2(2) of the 自動車の用途等の区分について(依命通達) (“On the Classification of Vehicle Uses, etc. (Directive)”) I listed in the references earlier says: タイヤえぐり、蓄電池箱等の占める面積は、物品の積載に支障がない限り物品積載設備の床面積に含めるものとする。 (“The area occupied by wheel wells, battery boxes, etc. shall be included in the floor area of the goods loading facility as long as it does not interfere with loading goods.”)
Reading this, it says that even areas with curved parts such as wheel wells count as loading area as long as they don’t get in the way of loading goods. “Goods” isn’t defined here and could include things like gravel, so I think it’s reasonable to read it as not requiring a flat floor.
- There must be a protective partition between the occupants and the cargo space
I bought one of those wire mesh panels used for shelving at a 100-yen shop, bent it 90 degrees and slid it under the folded seat.
During the inspection, the inspector pointed out that it wasn’t fixed with bolts. I replied, “Even if it were bolted in, you could take it out by turning the bolts, so there’s no meaningful structural difference, right?” The inspector wandered off somewhere muttering to himself, and the inspection passed without a hitch.
Besides, nothing specifies what kind of fixing a protective partition actually needs, so something like the tension rods you see in ordinary vans should be fine too.
As you can see, the safety standards compliance inspection that NALTEC carries out involves a lot of arbitrary judgment by inspectors, so on inspection day it’s best to have a solid understanding of the actual ordinances and the reasoning behind them, enough to win the argument with the inspector.
In the first place, as the Road Transport Vehicle Act states, NALTEC staff are required to report the results of their standards compliance examination in writing to MLIT. In other words, if they write something in the examination results that contradicts the Road Transport Vehicle Act or the procedures drawn up in line with MLIT ordinances, it could constitute the crime of making a false official document bearing a seal. In fact, there has been a case in the past where someone was charged, though prosecution was ultimately suspended.
If even that doesn’t get you anywhere, an inspection decision is, I believe, a form of administrative action, so filing a request for administrative review (shinsa seikyu) is another option.
About the maximum payload
For cargo registration there’s a provision like the one below. Earlier, you’ll also remember the requirement the load weight must exceed the occupant weight of the passenger seating.
On top of that, the ordinance defines passenger seating as everything except the front seats, and NALTEC’s rules say the payload is calculated in 50 kg increments.
Putting it all together, the payload has to be at least 100 kg and must not push the car past the maximum gross vehicle weight within the same classification.
In my case, I only stowed and fixed the seat, so the car could end up exceeding the maximum gross vehicle weight within the same classification (you can find this out by asking the manufacturer or NALTEC).
That means you’ll need to remove things like the spare tire. If that’s still not enough, try removing the onboard tools, the luggage board, the car navigation system and other interior parts.
(e) For designated vehicles, etc. whose permissible limits for gross vehicle weight and axle load are not clear, it shall be specified within a range not exceeding the maximum gross vehicle weight within the classification of the same model. (f) For vehicles other than those specified in (a) through (e), it shall be specified within a range not exceeding the weight obtained by multiplying the number of occupants for the removed passenger seating by 55 kg. Source: 7-124, 8-124 Maximum payload (Japanese)
Now take a look at the provision below. Based on the wording 産出される物品の積載量のうち最大のものとする (“shall be the largest of the calculated payloads”), NALTEC will tell you to take the largest payload possible within the gross weight.
The problem here is that taking the maximum payload can push the gross vehicle weight over 2 tonnes. Over 2 tonnes, the weight tax goes up, so I think it’s better to keep it as light as you can.
To make it easier to follow, take a car with a spec maximum gross vehicle weight of 2,040 kg, and compare a measured vehicle weight of 1,895 kg + 100 kg = 1,995 kg with 1,890 kg + 150 kg = 2,040 kg.
In that case, making it too light actually increases your weight tax, so it takes some fine-tuning. Usually you can adjust it by leaving in or taking out the luggage board and interior parts.
For these calculations, I’ve put the Excel sheet I made for myself on the web, so use the weight distribution calculator. Enter the front and rear axle weights, the wheelbase, the position of the seats you’re keeping, the payload and the tires’ load index, and it gives you the gross vehicle weight and the maximum payload you can get from the classification (in 50 kg increments). It also checks the front axle load ratio when loaded (it won’t pass below 20%) and the tire load ratio. You can see the verdict without logging in.
I haven’t verified whether it actually works yet, but for cars like one with a maximum gross vehicle weight of 2,090 kg, which ends up over 2 tonnes no matter what you do, I think you could register it once at over 2 tonnes and then get the gross weight to 2 tonnes or less by fully removing the seats and taking out interior parts to lighten it.
(1) The maximum payload of a vehicle shall be the largest of the payloads of goods calculated based on the standards in (2) through (11), as the amount that can be loaded within a range that complies with the provisions of this chapter, ensures safe operation, and prevents pollution.
Pre-screening
As of April 2025, the rules were revised to make it clear that pre-screening is not required for some structural modifications.
Even under the previous rules, depending on how you read them, pre-screening didn’t seem to be required for things like station wagon -> van, but interpretations probably differed between regional NALTEC offices, and I suspect the revision was meant to keep that from becoming a problem.
So this section is no longer needed, but there’s always a chance that document screening will be required again in the future, so I’m leaving it here.
Partial revision of the Examination Procedures Regulations (63rd revision) (Japanese)
Since October 28, 2024, you can submit the documents online. However, some documents have to be prepared on your end and then uploaded, so you’ll apply once you have the full set ready.
It takes up to 15 days from submission to get a response. So if you’ve already had your parking space certificate issued, submit early. (A parking space certificate is valid for about a month.) In my case, when I mentioned upfront that my parking space certificate was close to expiring, they processed it quickly.
How to submit
- Create an account on this site. You can do it via Log in -> Register account
- Once you’ve created an account and logged in, click New Inspection Notification
- Click Create Notification
- Select and fill in the following, then click Next
- Notification method:
個別届出(“Individual notification”) - Supplementary provision:
技術基準等の審査を要する自動車、自動車予備検査証の交付を受けた自動車又は使用の過程にある自動車若しくは特定の大型特殊自動車(“Vehicles requiring examination against technical standards, etc., vehicles issued a preliminary vehicle inspection certificate, vehicles in use, or certain large special vehicles”) - Category:
3.2.(1)技術基準等の審査を要する自動車(“3.2.(1) Vehicles requiring examination against technical standards, etc.”) - Submit to: select the inspection office where you’ll take the inspection
- Make, model and chassis number: fill in exactly as on the vehicle inspection certificate
- Notification method:
- Fill in the New Inspection Notification Form (Form No. 1) (Part 1) as follows
- Classification number or vehicle specification code: select
類別区分番号(“Classification number”) and enter the classification number shown on the vehicle inspection certificate in the input field - Structures and equipment changed relative to the designated vehicle of that model and classification number
- Structure/equipment changed: select
有(“Yes”) - Option: select
(記入欄のとおり)(“(As described in the entry field)”) - Entry field: enter the following (adjust to match your car’s current specs)
(“Change of seating capacity (5 → 3), right-hand second-row seat fixed / Change of use (passenger → cargo) / Change of body type (station wagon → van)”)乗車定員の変更(5人→3人)2列目右側座席固定用途変更(乗用→貨物)車体形状の変更(ステーションワゴン→バン)- Changes to structures/equipment related to the noise prevention device:
無(“No”) - Over-revolution prevention device related to the noise prevention device:
無(“No”)
- Structure/equipment changed: select
- Classification number or vehicle specification code: select
- The documents to upload for the New Inspection Notification Form (Form No. 1) (Part 2) can be created with a Windows application that NALTEC distributes. Download the zip file from the link below and run InitPreEntry.exe in the bin folder to launch it.
- New Inspection Notification Form No. 1, Part 2
- You can fill in the values by actually measuring the car or by asking the manufacturer for its spec sheet.
- For the parts that need calculations, some NALTEC offices may give you something called a weight distribution calculation sheet, but this seems to vary from office to office. Just copy over the numbers from the weight distribution calculator mentioned earlier.
- For the document identifying the vehicle, upload a scan of the Registration Identification Information Notice (toroku shikibetsu joho-to tsuchisho)
- For the spec sheet or vehicle specification table, upload the specs you got from the manufacturer and the four-view exterior drawing
- For the document certifying compliance with technical standards, upload the “Document on Compliance with the Technical Requirements of Each Provision of the Safety Standards”. Fill it in with calculations that fit your own car.
- ※ Update (October 2026): I’ve stopped publishing the Word file with sample inputs that I used to distribute here. Now, on the structural modification screen in Todoroku, you can generate this document and the four-view exterior drawing from the vehicle values you’ve entered in the ledger.
- Under other documents, upload the following
- A side-view photo annotated with the overall length
- A front-view photo annotated with the overall width
- A rear-view photo annotated with the overall height, the cargo area height and the opening height
- Photos showing the fixed seat cushion and the partition between the seats and the cargo area
Registering for cashless payment
Since January 2023, you can pay the fees for inspection and registration cashless.
You can register your payment details below.
Vehicle ownership procedures: payment information registration service (Japanese)
When registering your payment details, set the procedure type to used-vehicle new registration (chuko shinki). Otherwise, you can’t change the procedure type later, and you’ll end up paying in cash when the vehicle inspection certificate is issued.
If the car still has inspection time left and you’re not getting a tax refund via temporary deregistration or the like, choose structural modification.
Compulsory liability insurance is handled separately, so you’ll need cash just for that. Car accessory stores let you buy compulsory liability insurance by card, so getting it there is another option.
Also, the license plate fee at the plate center and the hole-punching fee for keeping your old plates as a souvenir are cash only.
Inspection day
Before inspection day, you need to book through the site below. When booking, the inspection type is 構造等変更検査 (“structural modification inspection”) even if the car has already been temporarily deregistered.
That said, at some locations it can be very hard to get a booking.
That’s because some businesses grab booking slots for multiple cars and cancel only the ones for cars that don’t show up on the day. There’s no particular penalty for doing this, so slots can fill up.
On the other hand, businesses that operate like this often cancel bookings on the day, so slots sometimes open up the same day. It’s worth checking early in the morning or during the first round of inspections.
Vehicle inspection online booking system (Japanese)
Here’s roughly how the day goes. The finer details probably differ between transport bureaus, so I’ll leave them out.
Also, if you didn’t register for cashless payment, you’ll have two or three extra forms to fill in on the day, so I recommend doing the procedures cashless if you can. The steps below leave out the cash-payment procedures.
- There’s a PC for printing inspection reception documents near the inspection reception counter at the registration office; scan the QR code on the vehicle inspection certificate and print the reception documents
- Go through the inspection in the regular periodic inspection lane
- Pick up the screening documents at the inspection booth where you submitted them ※not needed if you didn’t do pre-screening
- Have the vehicle weight and so on measured in the new-inspection lane
- Take out compulsory liability insurance as a standard cargo vehicle
- Whether it’s a used-vehicle new registration or a structural modification, fill in Form No. 1 and submit it at the registration counter
- Fill in the tax declaration form, go to the tax declaration counter and submit it
- Get your license plates at the plate counter (if the car still has its old plates, remove them first)
- Put the plates on and have them sealed
Wrap-up
I’m not a pro at administrative procedures, politics or law, so there may be mistakes in this post or in my thinking. If you spot any, I’d really appreciate your comments. As I mentioned at the top, I’ve turned the flow in this article, plus buying the car beforehand and selling it afterwards, into an 8-stage ledger in Todoroku. If you’re the next person to go through this, starting from the ledger keeps what to bring, where you need cash and what you spent all in one place, which should make things easier. I did cargo registration this time to save on taxes, but I’m left with some questions: isn’t the current tax system barely based on the beneficiary-pays principle in the first place? And aren’t these regulations driven mostly by the agendas of NALTEC and the police, rather than actually contributing to safer roads? What do you all think?